The Building and District Based Team distribution lists in the Kerio public folders have been removed from Kerio. Hopefully everyone has had an opportunity to create distribution lists in Kerio by now. You can verify or update your lists by doing a search in the online staff directory at http://staffdirectory.aea11.k12.ia.us/.
The new PeopleBox online e-mail system is a little behind schedule, but we still hope to have it ready by month end. When completed, PeopleBox will have the capability of creating e-mail groups, saving custom groups and sending e-mail to recipients directly from PeopleBox.
Creating Contact Groups in Kerio for Quickly Inviting Others to Meetings When using Kerio calendar to invite the same attendees to several meetings, the following instructions will provide information on how to create a contact folder with the attendees' information so you can quickly add them to a meeting invitation.
Currently Firefox 3 does not support right clicking with a mouse or using a two-finger click on a Macbook. You must use the following keyboard option. To perform a control click, hold down the control key on your keyboard (the one with "ctrl" or "control" written on it) and click your mouse, or if using a laptop, click on the trackpad button.
To create a new Contacts folder:
• On your folder tree, find the Contacts folder and ctrl + click on it.
• Select “New subfolder” from the drop down menu.
• Name your folder (example “Internal Tech”).
• Click OK.
To add contacts to your new Contacts folder:
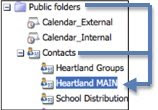
• On your folder tree, go to the Public folder and select the Heartland Main folder which is located inside the Contacts folder.
• Using the “Search” field, search for contacts to be added to your new contact folder.

• Add the contact by dragging the contact name from the Heartland Main folder to your new folder.
To use the Contacts folder to invite multiple guests to a meeting:
• Create a new meeting.
• Click on the “Invite attendees” tab.
• Click on the “Select…” button to open the Contacts dialog box.
• Under the Folder drop down menu, select the name of the new folder (example Contacts/Internal Tech).
• Click on the “Search” button. A list of names will appear.
If all contacts in the list are required, click on the first name in the list, hold down the shift key, click on the last name in the list and then click on “Required.”
All contacts will be added to the “Required” field.
If you want to select multiple contacts, but not the whole list, while holding down the Command Key, click on the individual contact name(s). Once you have selected your contact(s), click on either “Required” or “Optional.” Click “OK” to close the Contacts dialog box.

No comments:
Post a Comment